Are you tired of store-bought custards that taste artificial and leave you disappointed? I know that feeling all too well. But here’s the good news – creating silky, velvety homemade vanilla custard is easier than you might think! This recipe promises a luxuriously smooth vanilla custard that will elevate any dessert from ordinary to extraordinary.
Hi! I’m Emily, the creator behind Bikren Cook. My journey with homemade vanilla custard began in my grandmother’s kitchen, where I watched in awe as she transformed simple ingredients into golden pools of creamy perfection. After years of perfecting this classic recipe, I’m excited to share my foolproof method with you. In this guide, you’ll discover expert tips for selecting ingredients, mastering the cooking technique, and creating variations to suit any occasion. Let’s create some delicious memories around your table with this classic dessert base!
Why This Homemade Vanilla Custard Recipe Works
- Uses simple pantry staples you likely already have
- Requires just 15 minutes of active cooking time
- Creates a versatile base for countless desserts
- Achieves that perfect silky texture without lumps
- Delivers authentic vanilla flavor that’s miles above store-bought versions
Choosing the Right Ingredients for Homemade Vanilla Custard
Best Dairy Options for Vanilla Custard
For truly exceptional homemade vanilla custard, whole milk delivers the perfect balance of richness and flavor. While you can use 2% milk, the higher fat content in whole milk creates that signature creamy mouthfeel we all crave. For an ultra-luxurious version, replace half the milk with heavy cream – your taste buds will thank you!
Egg Selection for Perfect Vanilla Custard
Large, fresh eggs are crucial for homemade vanilla custard success. The yolks contain natural emulsifiers that give custard its characteristic thickness and silky texture. Room temperature eggs blend more smoothly into your mixture, preventing those dreaded scrambled bits from forming.
Vanilla Options for Homemade Custard
While vanilla extract works perfectly well, this is one recipe where splurging on a vanilla bean creates a noticeable difference. Those tiny black specks aren’t just visually appealing – they deliver intense vanilla flavor that transforms a good custard into an unforgettable one. If using extract, choose pure vanilla rather than imitation for the most authentic taste.
Homemade Vanilla Custard Ingredients & Prep

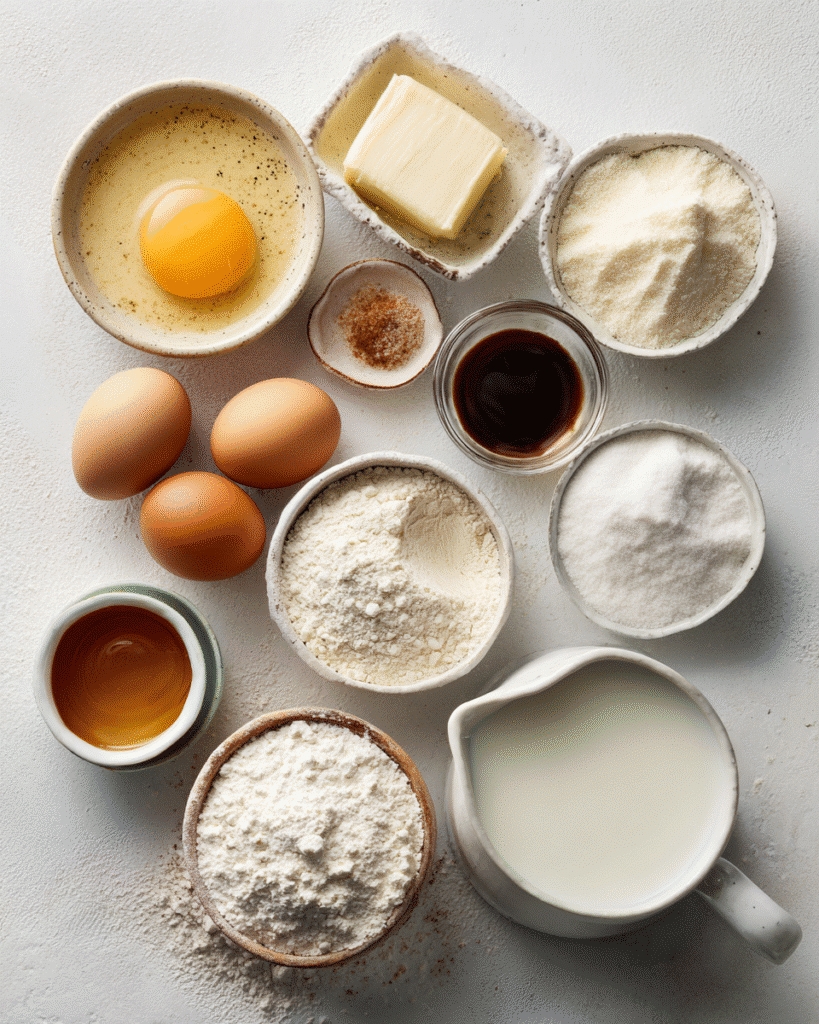
Custard Base Essentials
- Eggs: Separate yolks carefully, ensuring no white remains for the smoothest texture
- Sugar: Granulated works best, dissolving evenly for consistent sweetness
- Cornstarch: The secret ingredient for foolproof thickening without graininess
Flavor Components for Homemade Vanilla Custard
- Whole milk
- Heavy cream (optional)
- Pure vanilla extract or 1 vanilla bean
- Pinch of salt (enhances sweetness and vanilla notes)
- Optional: Lemon zest for brightness
Equipment Needed
- Heavy-bottomed saucepan
- Whisk (a balloon whisk works best)
- Strainer or fine-mesh sieve
- Heat-resistant bowl for cooling
Looking for more delicious dessert ideas? Check out my decadent Red Velvet Cheesecake Brownies that pair wonderfully with this custard!
Step-by-Step Homemade Vanilla Custard Instructions
Pre-Cooking Vanilla Custard Prep
- In a medium bowl, whisk together egg yolks and sugar until pale yellow and slightly thickened (about 2 minutes).
- Whisk in cornstarch until completely smooth with no lumps.
- If using a vanilla bean, split it lengthwise and scrape out the seeds. Add both seeds and pod to your milk.
- Heat milk (and cream if using) in a heavy-bottomed saucepan until steaming but not boiling.
Cooking Method for Perfect Homemade Vanilla Custard
- Slowly pour about 1/4 cup of the hot milk mixture into the egg mixture, whisking constantly (this is called tempering).
- Continue adding hot milk gradually while whisking to prevent eggs from scrambling.
- Return the entire mixture to the saucepan and cook over medium-low heat.
- Stir continuously with a wooden spoon or heat-resistant spatula, making sure to scrape the bottom and sides of the pan.
- Cook until the custard thickens enough to coat the back of a spoon (about 5-7 minutes).
Doneness Check for Homemade Vanilla Custard
Your homemade vanilla custard is ready when:
- It reaches 175°F on an instant-read thermometer
- When you draw your finger across the back of a coated spoon, it should leave a clear path
- The consistency should be similar to thick pancake batter – pourable but substantial
Finishing Your Homemade Vanilla Custard
- Immediately strain the custard through a fine-mesh sieve into a clean bowl to remove any lumps or bits of cooked egg.
- If using vanilla extract instead of a bean, stir it in now.
- Place plastic wrap directly on the surface of the custard (this prevents a skin from forming).
- Cool completely at room temperature before refrigerating for at least 2 hours.
Pro Tips for Perfect Homemade Vanilla Custard
Avoiding Common Vanilla Custard Mistakes
- Never walk away from custard while it’s cooking – it can go from perfect to scrambled in seconds
- Keep heat moderate to low – patience yields the silkiest results
- If you see any signs of curdling, immediately remove from heat and whisk vigorously
- For extra insurance against lumps, use an immersion blender after straining
Tool Recommendations for Homemade Vanilla Custard
- Invest in a silicone-coated whisk that won’t scratch non-stick pans
- A flat-bottomed wooden spoon reaches corners where lumps like to hide
- An instant-read thermometer takes the guesswork out of doneness
- Heat-diffuser plate for gas stoves helps maintain even, gentle heat
Storage & Serving Homemade Vanilla Custard
- Custard will keep in the refrigerator for up to 3 days in an airtight container
- Never freeze custard – the texture becomes grainy when thawed
- Bring custard to just below room temperature for the most luxurious mouthfeel when serving
For a delightful pairing with this custard, try my delicious lemon cake that offers the perfect contrast of bright citrus with creamy vanilla!
Homemade Vanilla Custard Flavor Variations
Chocolate Vanilla Custard
Add 3 ounces of chopped dark chocolate to the hot, strained custard and stir until melted for a decadent chocolate version.
Dairy-Free Vanilla Custard Options
Replace dairy milk with equal parts coconut milk (full-fat from a can) or almond milk with 1 tablespoon of coconut oil for richness.
Global Vanilla Custard Inspirations
| Country | Variation | Key Ingredients |
|---|---|---|
| France | Crème Pâtissière | Adds flour for sturdier pastry filling |
| Spain | Natillas | Cinnamon-infused with cookie topping |
| England | Bird’s Custard | Uses cornstarch instead of eggs |
| Portugal | Leite Creme | Caramelized sugar top like crème brûlée |
| Italy | Crema Pasticcera | Lemon zest and sometimes Marsala |
Serving Suggestions for Homemade Vanilla Custard
- Pour warm over fresh fruit crumbles or cobblers
- Use as filling for eclairs, cream puffs, or Boston cream pie
- Layer in trifles with berries and pound cake
- Serve in small bowls topped with fresh berries and mint
- Use as base for ice cream (churn when chilled)
Need another spectacular dessert idea? Check out my Pink Velvet Raspberry Cheesecake that’s sure to impress your guests!
If you’re looking for more dessert inspiration, browse my collection on Pinterest where I share stunning dessert ideas that will elevate your next gathering.
Homemade Vanilla Custard FAQs
Why did my vanilla custard curdle?
Curdling typically happens when heat is too high or cooking continues too long. Keep heat moderate and remove from the stove the moment it thickens. If you notice curdling beginning, immediately remove from heat and whisk vigorously.
Can I make vanilla custard ahead of time?
Absolutely! Homemade vanilla custard can be made up to 3 days ahead and stored in the refrigerator. Just place plastic wrap directly on the surface to prevent a skin from forming.
What’s the difference between vanilla custard and pudding?
Custard is egg-based and generally has a richer, silkier texture than pudding, which typically uses cornstarch as its main thickener without eggs.
Final Thoughts on Homemade Vanilla Custard
Mastering homemade vanilla custard opens a world of dessert possibilities. This versatile classic can transform simple ingredients into something truly special. The time you spend stirring at the stove is rewarded with a silky, luxurious treat that store-bought versions simply can’t match.
I’d love to see how your homemade vanilla custard turns out! Join the thousands of home cooks who have mastered this recipe and share your creations on social media. Remember, the journey to custard perfection might take a practice batch or two, but the results are absolutely worth it.
Now that you’ve conquered classic vanilla custard, why not expand your dessert repertoire? Try incorporating your custard into a show-stopping trifle or using it as the filling for a fresh fruit tart. The possibilities are endless!

