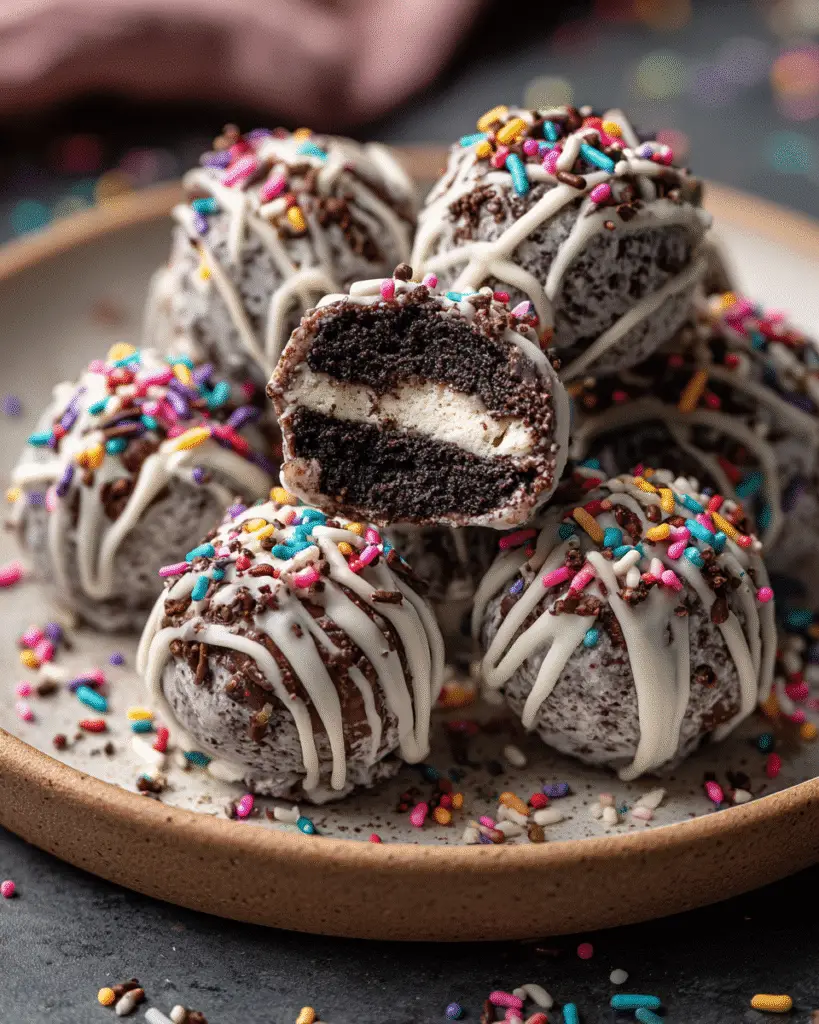
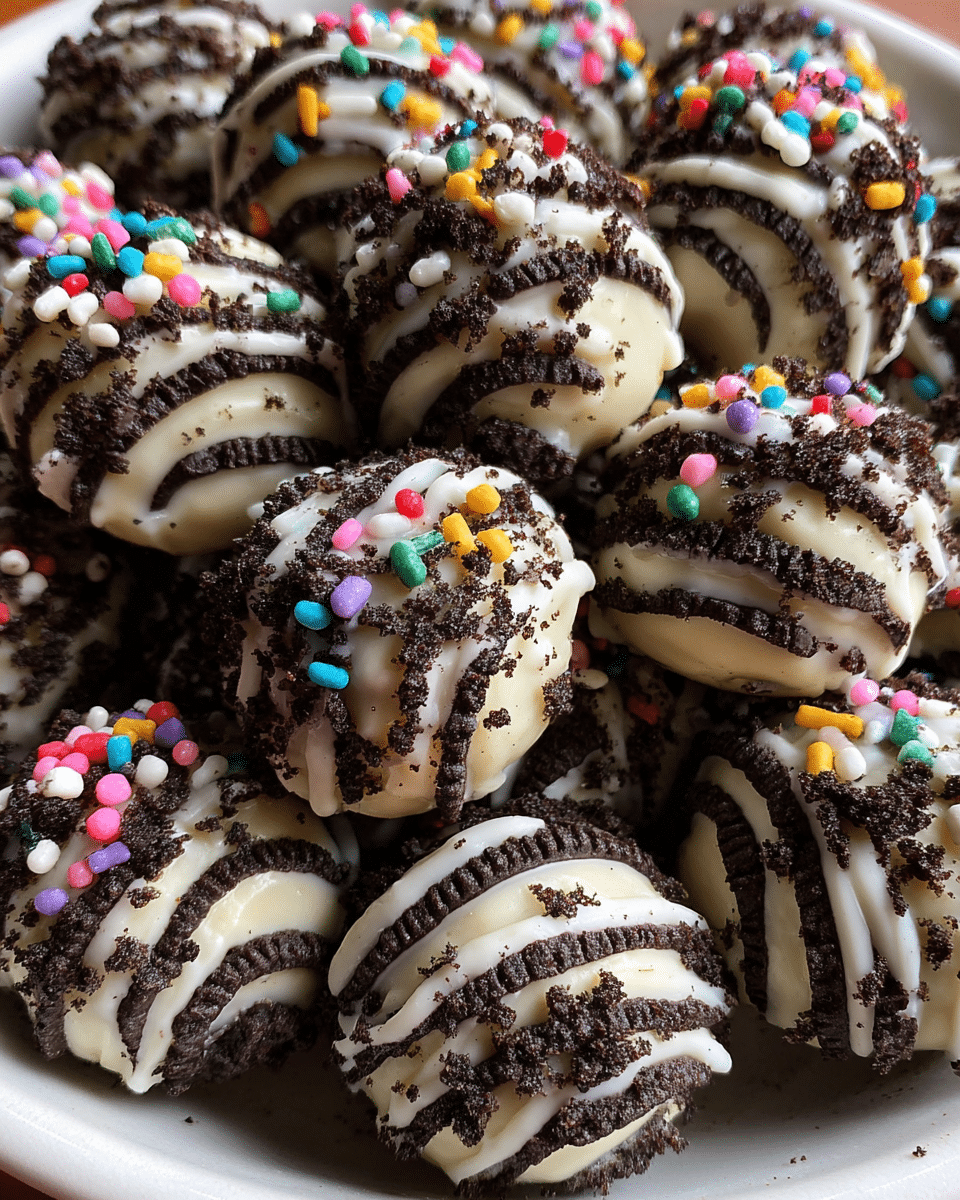
Mummy Oreo Balls – Are you tired of serving the same boring Halloween treats year after year? These spooky, wrapped-up delights will transform your dessert table from ordinary to extraordinary! As Emily from Bikren Cook, I’ve spent countless hours perfecting treats that bring families together, and these mummy Oreo balls have become an absolute favorite in my kitchen. Every Halloween season, I watch as both kids and adults light up when they see these adorable little mummies staring back at them. In this guide, I’ll share my foolproof method for creating these crowd-pleasing treats, including ingredient selection tips, decoration techniques, and creative variations that will make your Halloween celebration unforgettable.
Why This Mummy Oreo Balls Recipe Works
These mummy Oreo balls combine convenience, flavor, and pure Halloween magic in every bite. Here’s why they’re perfect for your spooky celebrations:
• Uses simple, affordable ingredients you can find at any grocery store
• Ready in just 30 minutes with minimal prep time required
• Perfect for Halloween parties, school events, or cozy family nights
• No-bake convenience means no oven time during busy Halloween preparations
• Irresistibly creamy texture that melts in your mouth with every bite
Choosing the Right Oreos for Mummy Oreo Balls
The foundation of perfect mummy Oreo balls starts with selecting quality ingredients that will give you the best results.
Best Oreo Types for This Recipe
Original chocolate Oreos work best because their dark color creates perfect contrast against the white chocolate coating. The classic flavor profile provides the ideal base that won’t compete with your mummy decorations. Double Stuf Oreos can also work wonderfully, giving you extra cream filling for an even richer texture.
Buying Tips for Success
Look for fresh Oreos with crisp cookies that haven’t absorbed moisture. Check the expiration date and ensure the package hasn’t been damaged. Store-brand chocolate sandwich cookies work just as well if you prefer a budget-friendly option.
Creative Substitutions
Golden Oreos create a different flavor profile with their vanilla cookies, while mint Oreos add a refreshing twist. For gluten-free versions, substitute with your favorite gluten-free chocolate sandwich cookies.
Ingredients & Prep for Perfect Mummy Oreo Balls
Essential Cookie Prep
Start by crushing 36 chocolate sandwich cookies until you achieve fine, even crumbs. A food processor works best, but you can also place cookies in a sealed bag and crush with a rolling pin. The key is achieving uniform texture without any large chunks.
Coating and Decoration Essentials
• 8 oz cream cheese (softened to room temperature)
• 2 lbs white chocolate chips or melting wafers
• Mini chocolate chips for the mummy eyes
• 2 tablespoons coconut oil for smooth melting
Pantry Staples You’ll Need
Ensure you have parchment paper, cookie sheets, and toothpicks for dipping. Having these basics ready makes the process seamless and enjoyable.
Step-by-Step Cooking Instructions for Mummy Oreo Balls

Pre-Cooking Prep for Mummy Oreo Balls
Mix your crushed cookies with softened cream cheese until well combined. The mixture should hold together when squeezed but not be overly wet. Roll into 1.5-inch balls and place on parchment-lined baking sheets. Chill for 30 minutes to firm up.
Coating Method for Mummy Oreo Balls
Melt white chocolate with coconut oil in 30-second intervals, stirring between each heating. The mixture should be smooth and flowing. Dip each chilled ball using a toothpick, allowing excess chocolate to drip off before placing on parchment paper.
Decoration Technique for Mummy Oreo Balls
While the white chocolate is still soft, place two mini chocolate chips for eyes. Using a fork, drizzle additional melted white chocolate in random patterns to create mummy bandage effects.
Setting Time for Mummy Oreo Balls
Allow decorated balls to set at room temperature for 15 minutes, or refrigerate for 5 minutes for quicker setting. The chocolate should be completely firm before handling or storing.
Pro Tips for Perfect Mummy Oreo Balls
Achieving Smooth Coating for Mummy Oreo Balls
Keep your melted chocolate at the right consistency by reheating gently as needed. If the chocolate becomes too thick, add a small amount of coconut oil to restore smooth flow.
Essential Tool Recommendations for Mummy Oreo Balls
A candy thermometer helps maintain ideal melting temperature, while a dipping fork creates cleaner results than toothpicks. Silicone baking mats prevent sticking better than regular parchment paper.
Storage & Freshness for Mummy Oreo Balls
Store finished mummy Oreo balls in airtight containers in the refrigerator for up to one week. For longer storage, freeze for up to three months, thawing at room temperature before serving. For more delicious party appetizers that complement these sweet treats, check out our Four Cheese Mushroom Toasts recipe.
Flavor Variations for Mummy Oreo Balls
Transform your basic mummy Oreo balls into exciting flavor adventures that cater to different tastes and dietary needs.
Spooky Flavor Twists
Add orange food coloring to create pumpkin mummies, or incorporate pumpkin spice into the cream cheese mixture. Mint extract creates refreshing ghost-like variations, while orange zest adds citrusy brightness.
Dietary-Friendly Mummy Oreo Balls
Use sugar-free chocolate sandwich cookies and sugar-free white chocolate for diabetic-friendly versions. Dairy-free cream cheese alternatives work perfectly for lactose-intolerant guests.
Global Halloween Flavors
Create Mexican hot chocolate versions with cinnamon and cayenne, or try matcha white chocolate coating for an Asian-inspired twist. European influences include lavender or earl grey flavoring in the cream cheese mixture.
| Flavor Variation | Key Ingredients | Dietary Notes | Prep Time |
|---|---|---|---|
| Pumpkin Spice Mummy | Pumpkin spice, orange coloring | Vegetarian-friendly | 35 minutes |
| Mint Chocolate Mummy | Mint extract, green food coloring | Refreshing twist | 30 minutes |
| Sugar-Free Mummy | Sugar-free cookies, sugar-free chocolate | Diabetic-friendly | 30 minutes |
| Dairy-Free Mummy | Vegan cream cheese, dairy-free chocolate | Vegan option | 35 minutes |
Serving Suggestions for Mummy Oreo Balls
Present your mummy Oreo balls on Halloween-themed platters alongside complementary treats and beverages that enhance the spooky experience.
• Pair with warm beverages: Hot chocolate, spiced apple cider, or pumpkin spice lattes create cozy autumn vibes
• Halloween party spreads: Arrange with orange and black candies, plastic spiders, and dry ice for dramatic effect
• Kid-friendly presentations: Serve in individual cupcake liners with Halloween stickers for party favors
• Adult gatherings: Present on elegant black platters with battery-operated tea lights for sophisticated ambiance
For a complete Halloween spread, consider adding our Cranberry Balsamic Flatbread with Goat Cheese as a savory balance to these sweet treats.
FAQs About Mummy Oreo Balls
Can I make Mummy Oreo Balls ahead of time?
Absolutely! These mummy Oreo balls actually taste better after sitting overnight as flavors meld together. Prepare them up to three days before your event and store covered in the refrigerator.
What if my white chocolate seizes while melting?
If your chocolate becomes grainy, add one tablespoon of coconut oil and stir gently. Heat in 10-second intervals until smooth again. Prevention tip: ensure no water contacts the chocolate during melting.
Are Mummy Oreo Balls safe for children with food allergies?
Always check ingredient labels for allergens. These contain gluten, dairy, and may contain nuts depending on your cookie choice. Consider allergen-free alternatives for sensitive guests.
How do I fix cracked coating on my Mummy Oreo Balls?
Cracking usually occurs when balls are too cold when dipped. Let chilled balls sit at room temperature for 5 minutes before coating, and ensure your melted chocolate isn’t too hot.
If you’re looking for more family-friendly recipes that bring everyone together, our Lemon Chicken Veggie Orzo Stir Fry offers a delicious weeknight dinner option.
Create Halloween Magic Tonight!
These mummy Oreo balls represent everything I love about cooking – they’re simple enough for beginners yet impressive enough to wow any crowd. The joy on faces when people see these adorable mummies is exactly why I share recipes that bring families together around the table.
Ready to start your Halloween baking adventure? For endless inspiration and more crowd-pleasing recipes, explore our complete collection on Pinterest where thousands of home cooks share their creative twists and success stories!
Join the growing community of home cooks who’ve made these mummy Oreo balls the star of their Halloween celebrations. Share your creations, try our other seasonal favorites, and let’s make this Halloween deliciously memorable together!

